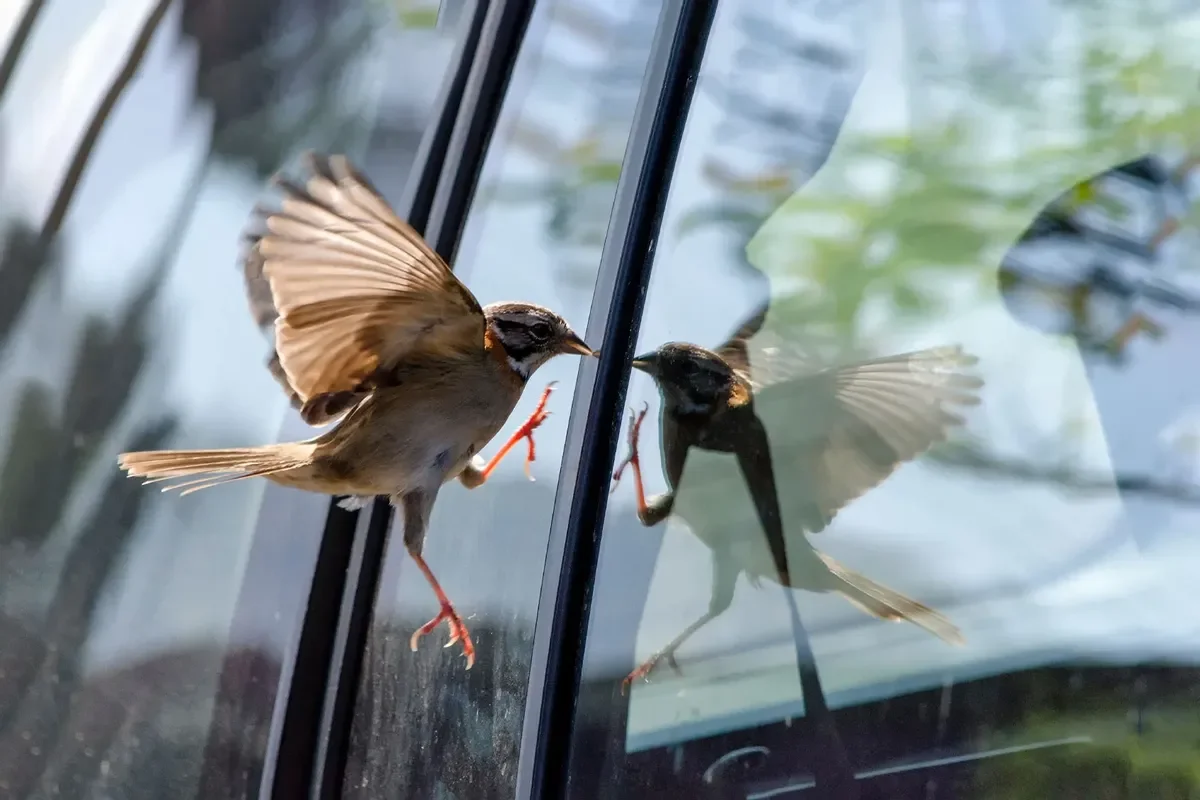
Window Collision Prevention
Window collisions kill over 1 BILLION birds each year.
You can make a difference. Start preventing collisions now.
Preventing collisions is as easy as 1-2-3
Select a solution
Install it the right way
Reduce outdoor lighting at night.
Start with the window(s) causing collisions first for biggest impact.
MN Bird Coalition collects data on window collisions to support research and advocacy that protect birds. We also track bird-safe glass installations to measure progress across Minnesota. Every report—whether from a home, business, or farm—helps advance bird safety.
Click here to learn what to do if you found an injured bird.
Choosing bird-safe products can feel confusing. There are a lot of options—and not all of them work equally well.
This page shows you what actually works and how to install it correctly, so you can make your windows bird-safe with confidence.
Keep scrolling to learn how to make your windows bird-safe.
Why do birds hit windows?
Step 1: Selecting a Solution
The first step is choosing a solution. You can use simple DIY methods or ready-made products—both can be highly effective. MNBC recommends options that have been scientifically tested, so you can be confident your efforts will help save birds.
DIY Solutions
You can make your windows bird-safe using simple materials you may already have at home.
DIY fixes are affordable, simple to apply, and just as effective as store-bought products when installed correctly.
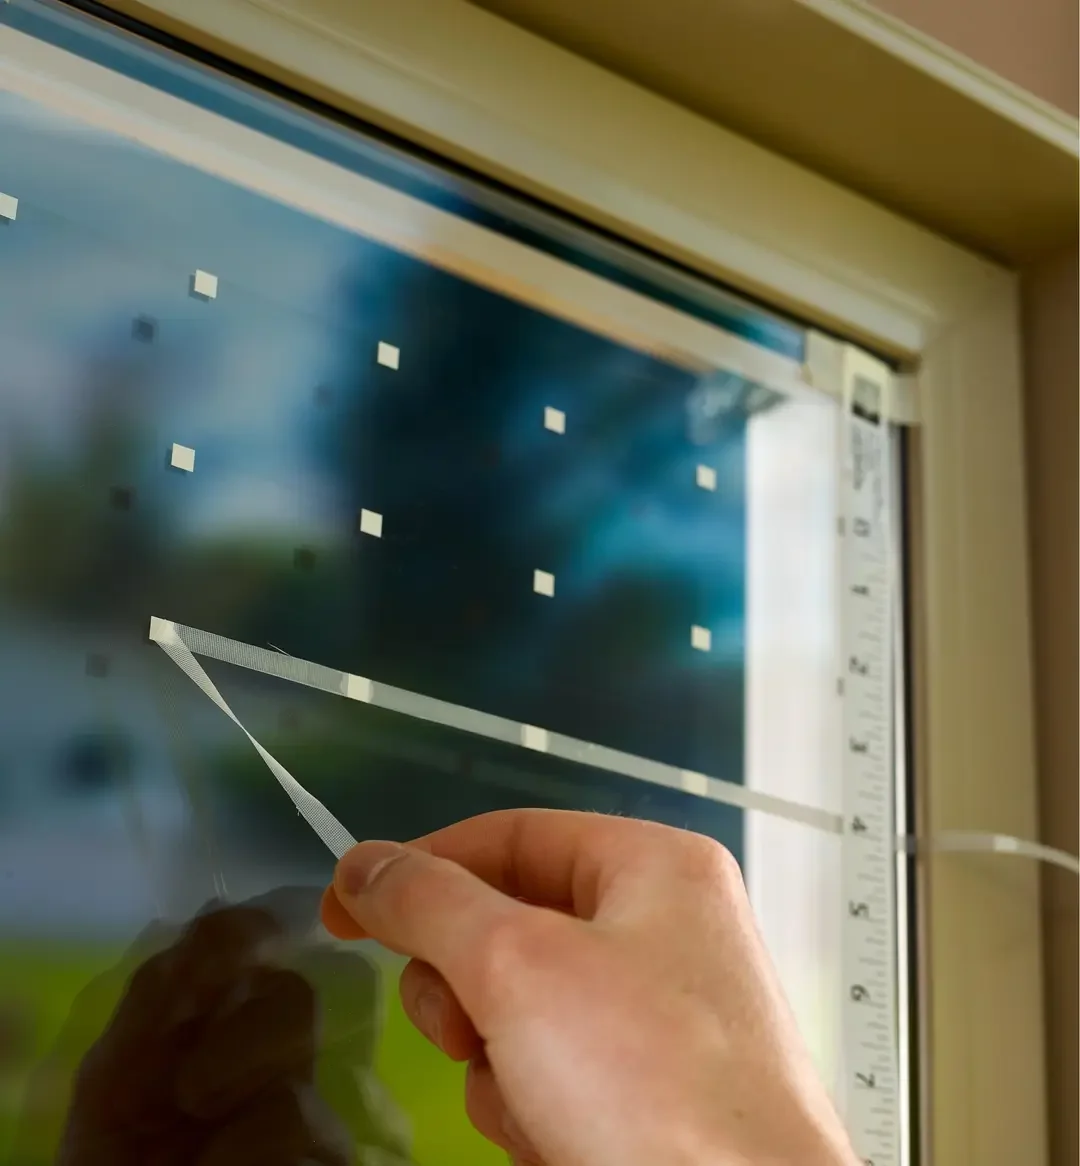
Option 1: Tape
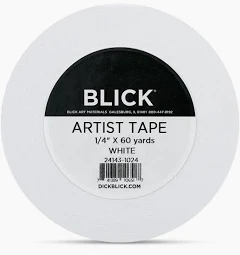
1/4” artist tape can be used to create patterns that break up reflections and save birds. Be sure to space each tape line no more than 2” apart.
The effectiveness will depend on proper installation. But applied on the outside of window no more than 2” apart should reduce around 90% or more of collisions.
Option 2: Oil Paint Marker
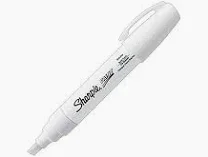
Oil paint markers can be used to create designs or patterns on window to break up reflections and save birds. Be sure to space each element of your design no more than 2 inches apart.
The effectiveness of this solution depends on proper installation. When applied to the outside of the glass, using crisp white markings spaced no more than 2 inches apart across the entire surface, it can greatly reduce collisions.
Dark-colored 550lb (4mm, 1/8”) paracord can be strung at 4” intervals across entire glass surface from top to bottom will effectively reduce collisions.
Click here for DIY installation methods.
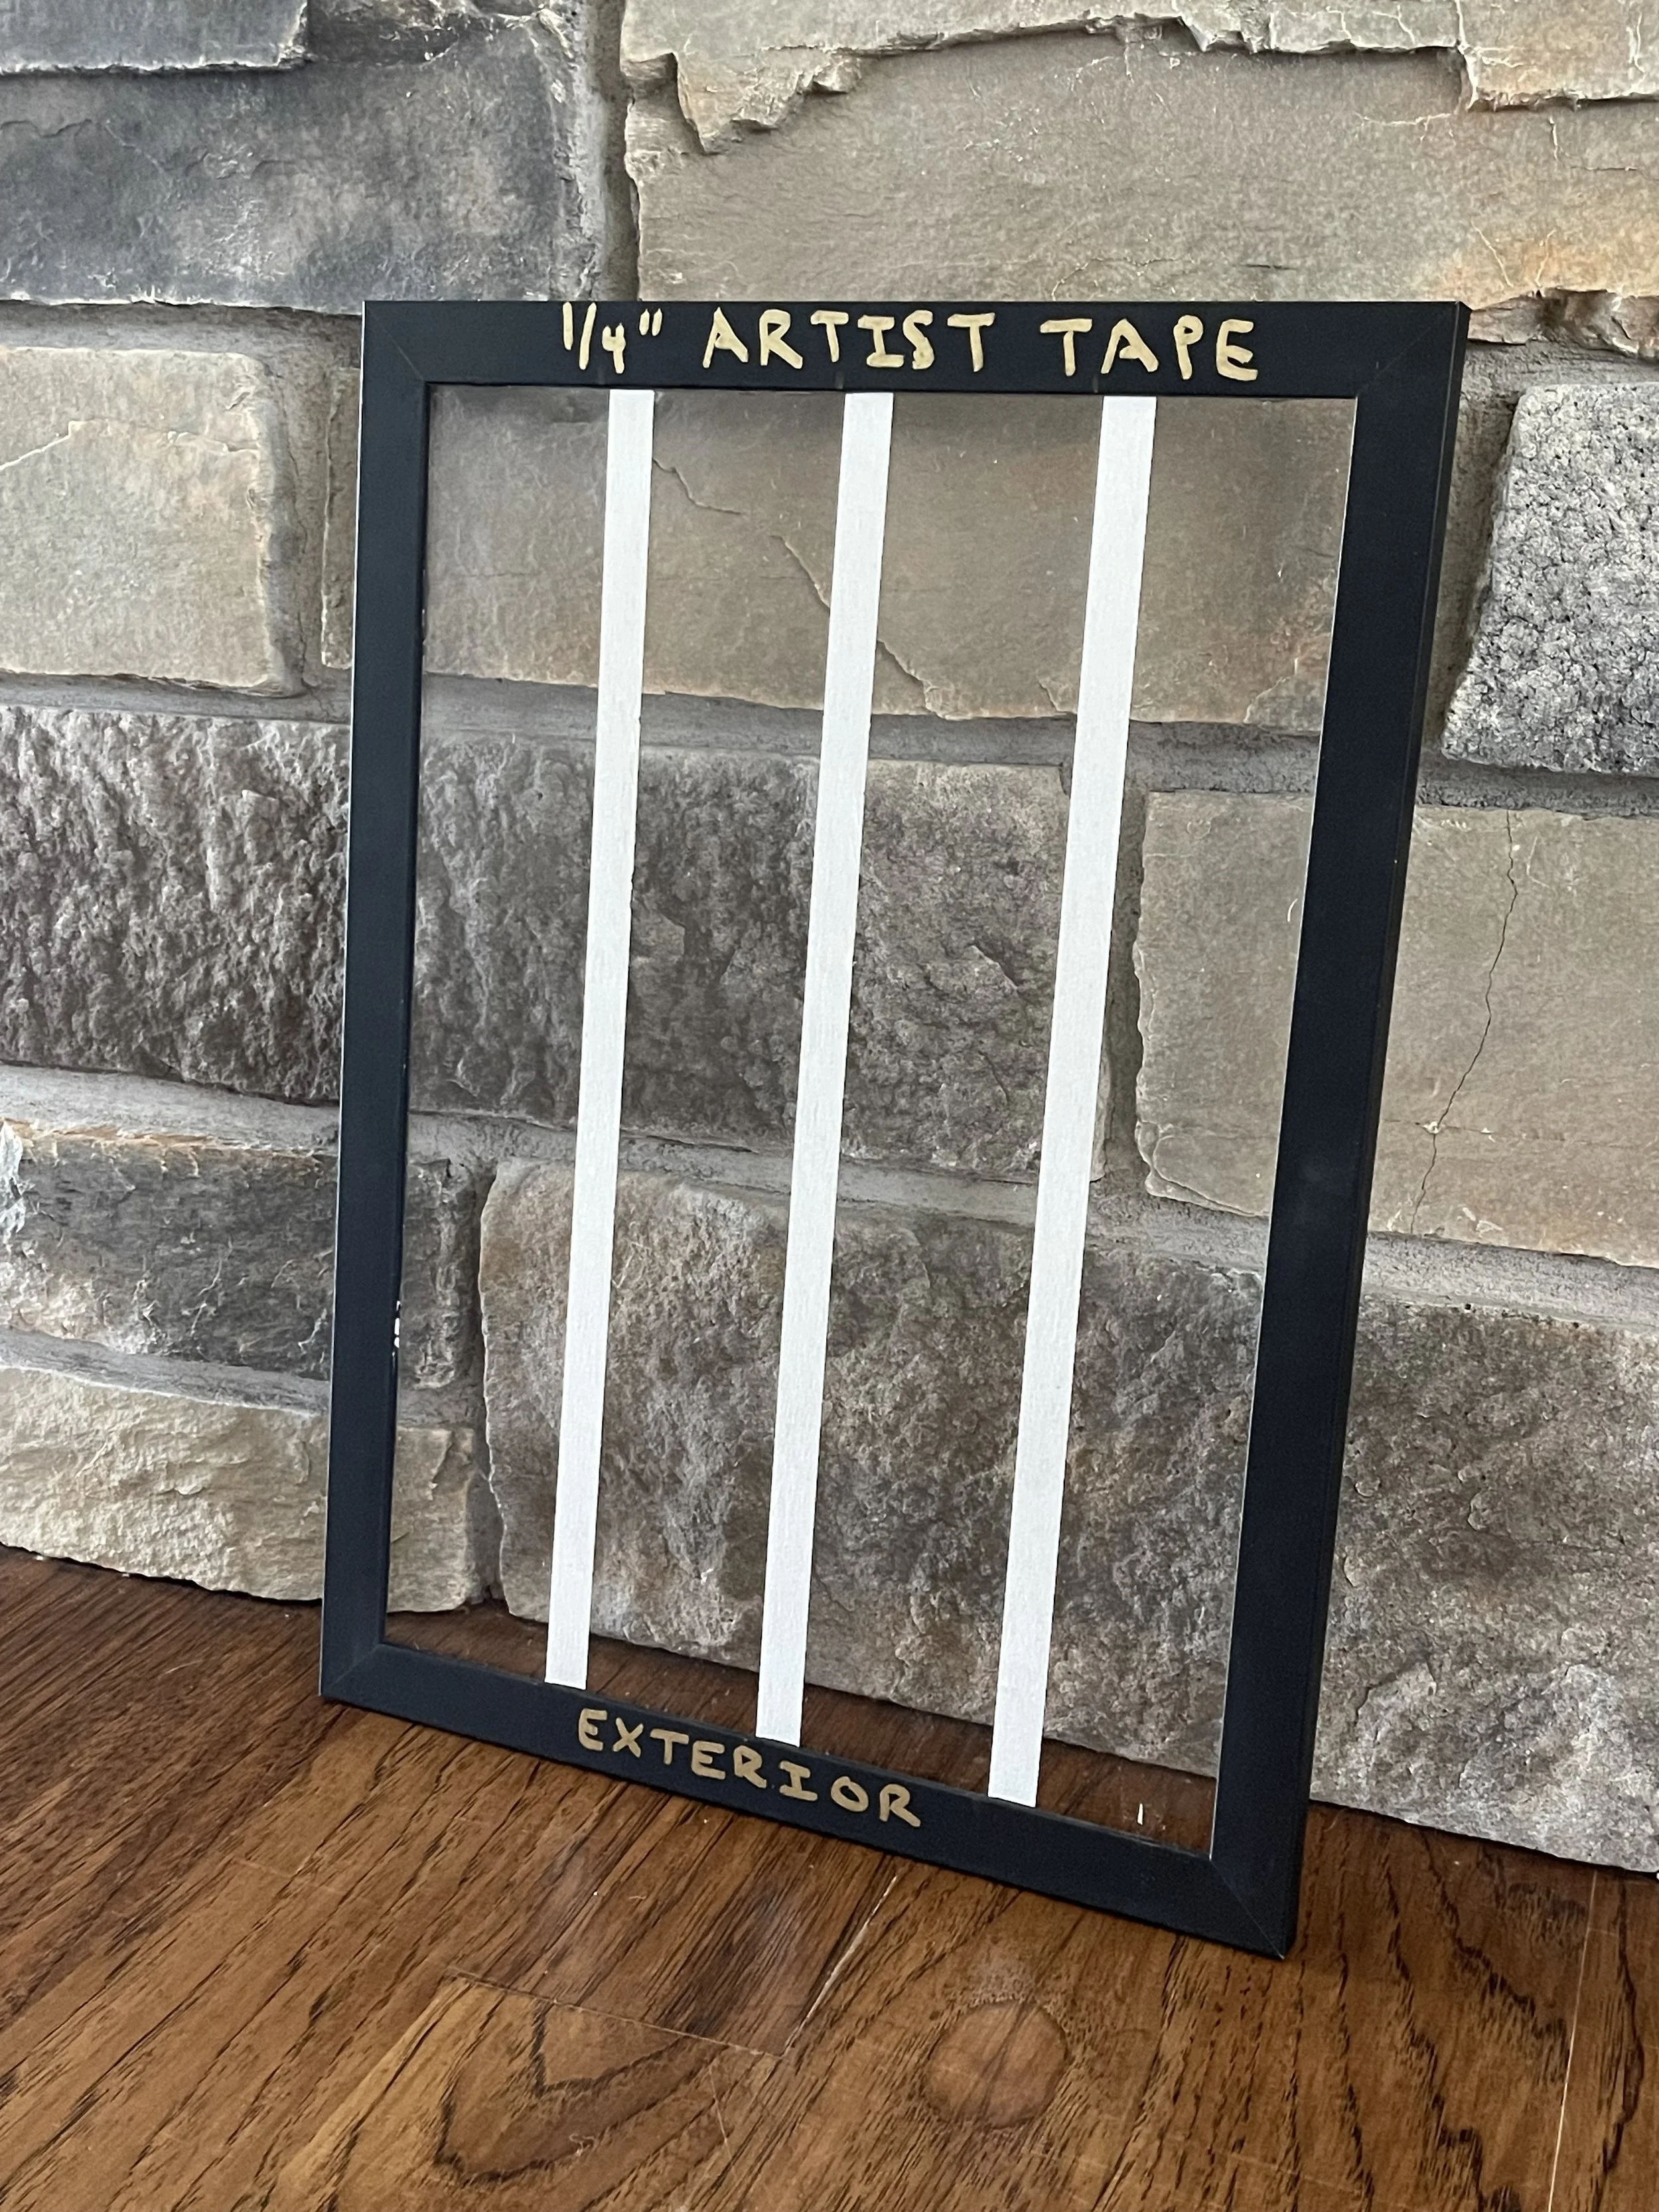
Example of how artist tape can be used to create a striped pattern spaced 2” apart.
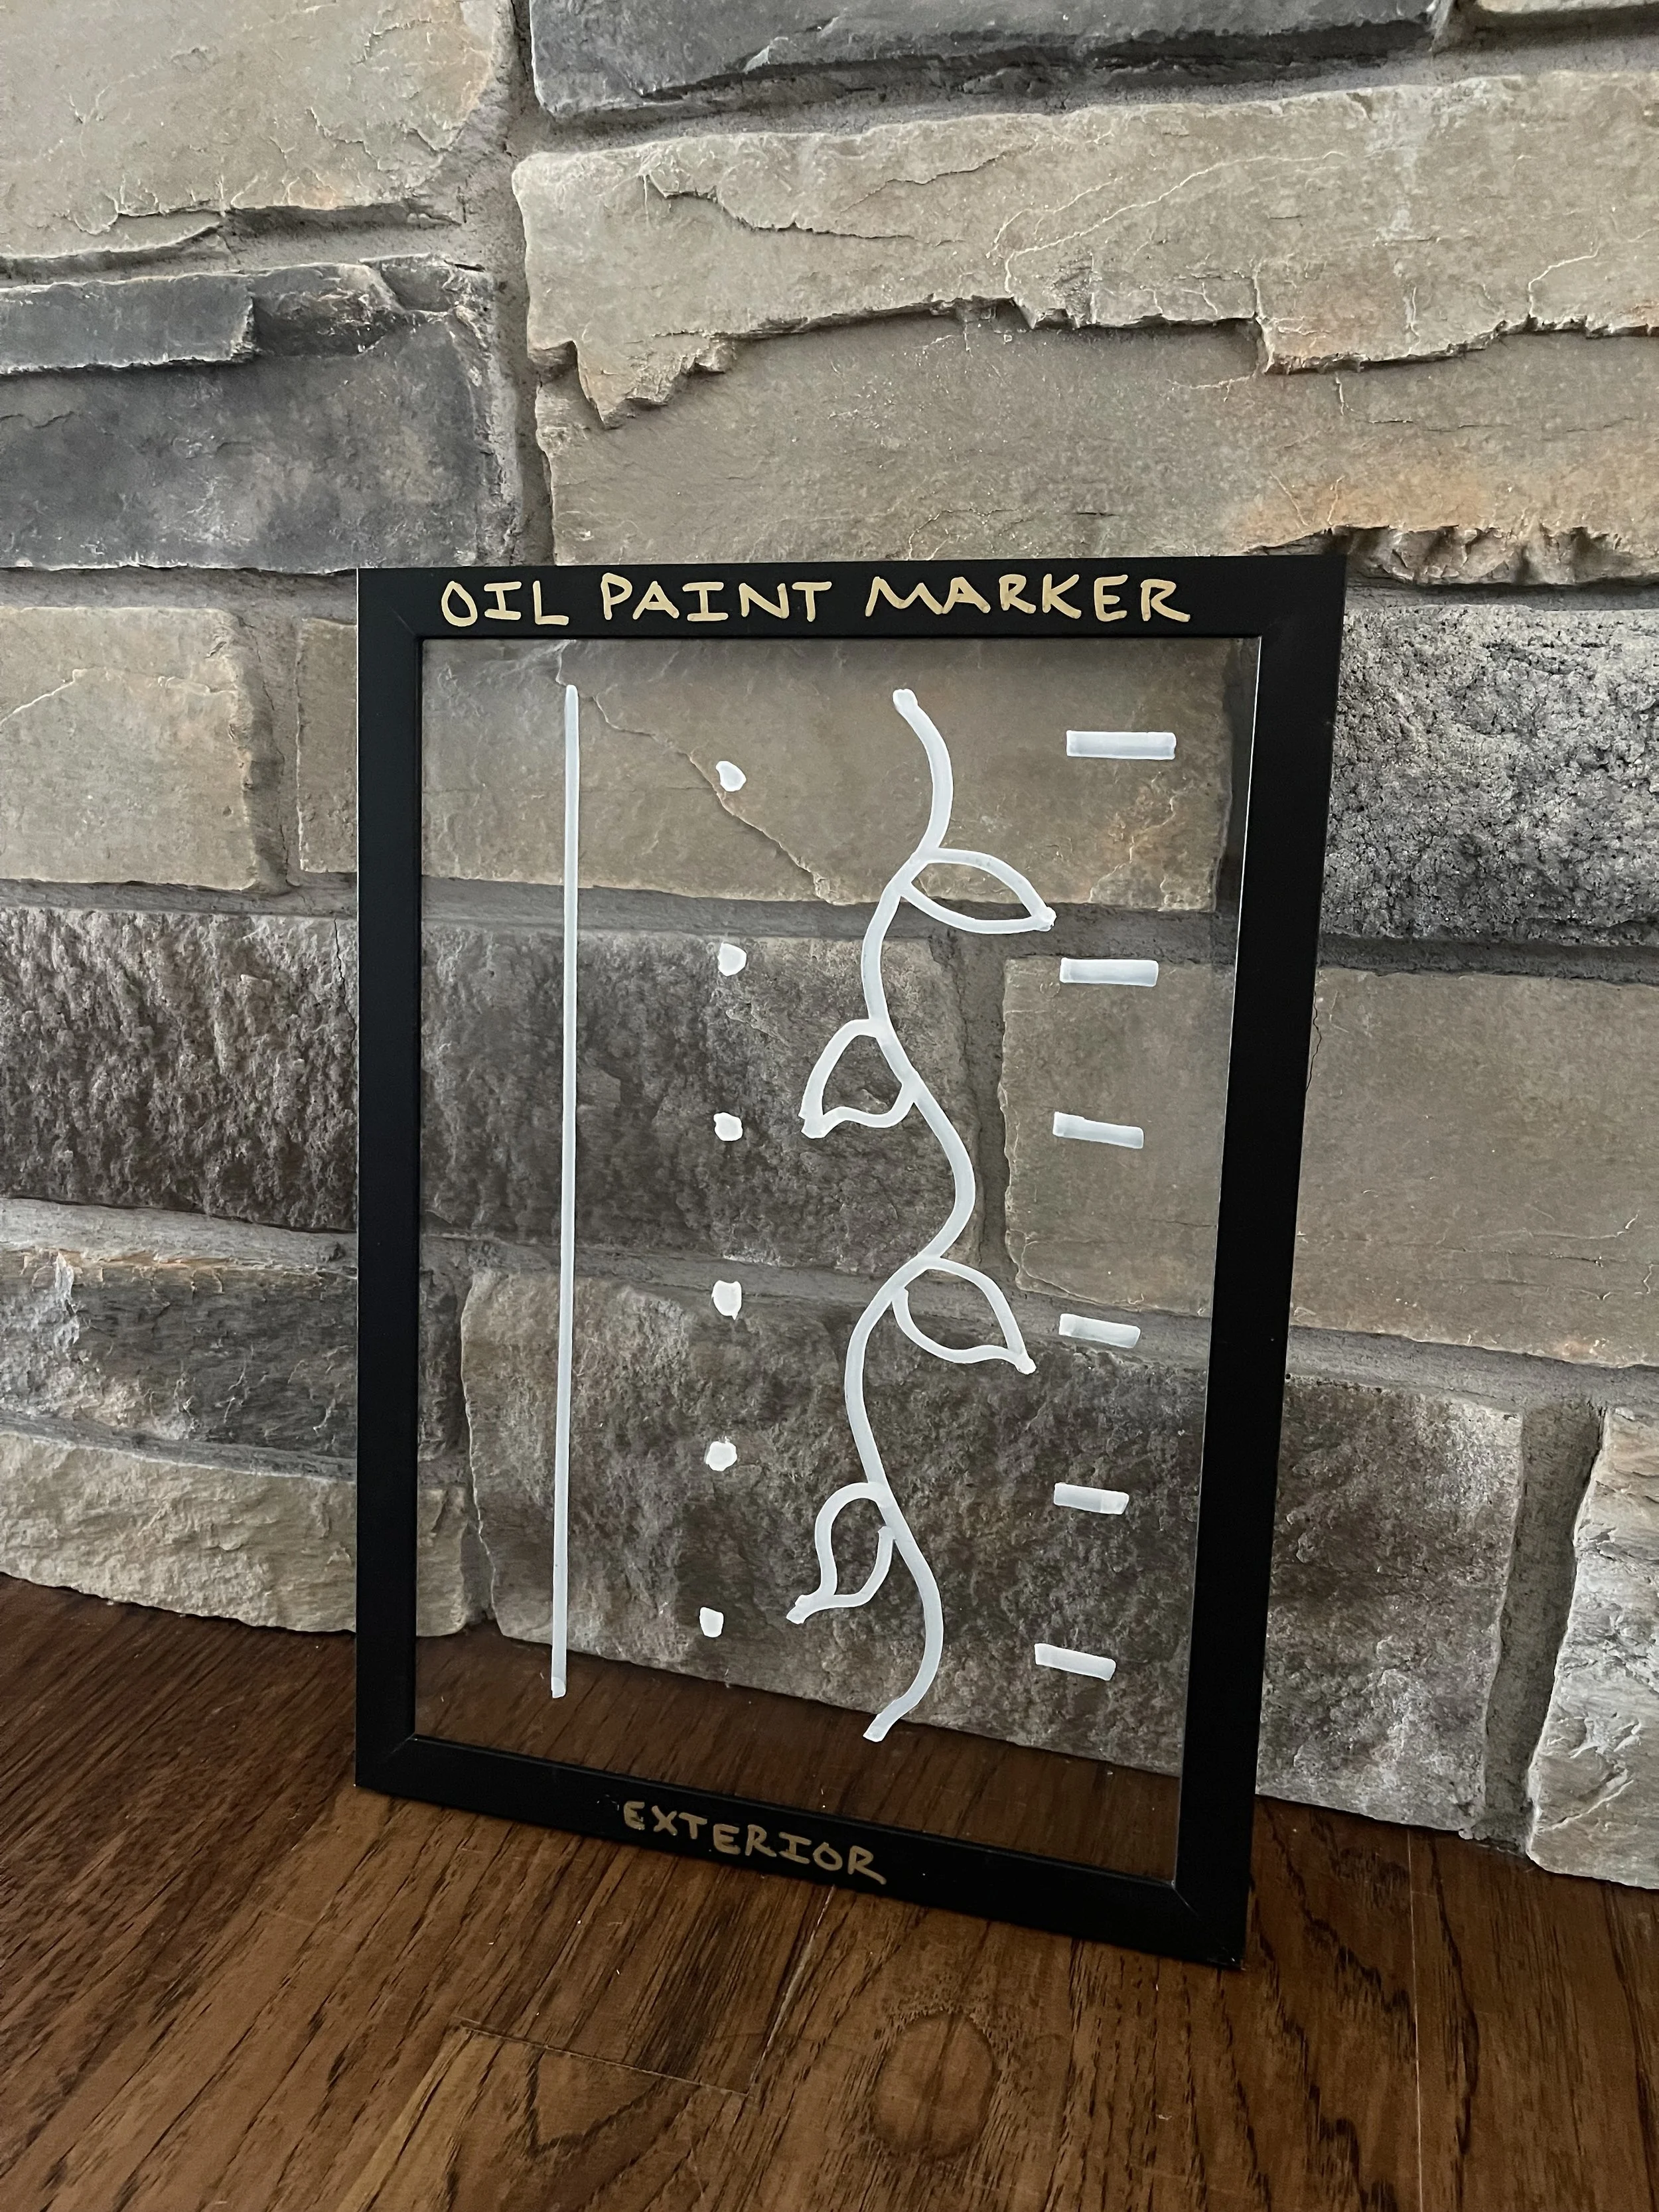
Example of how free hand designs can be applied to exterior of glass. Lines, dots, waves or dashes are effective. Get creative! Make a work of art. White gives best results.
Oil paint markers won’t wash off in rain. Remove with razor blade and/or rubbing alcohol.
Pro-tip: You can also use tempera paint (not water fast) or even bar soap to create patterns on the window. Remember, the idea is to break up those reflections into small sections in a way that is visible to birds.
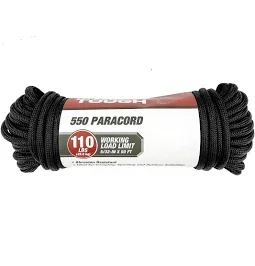
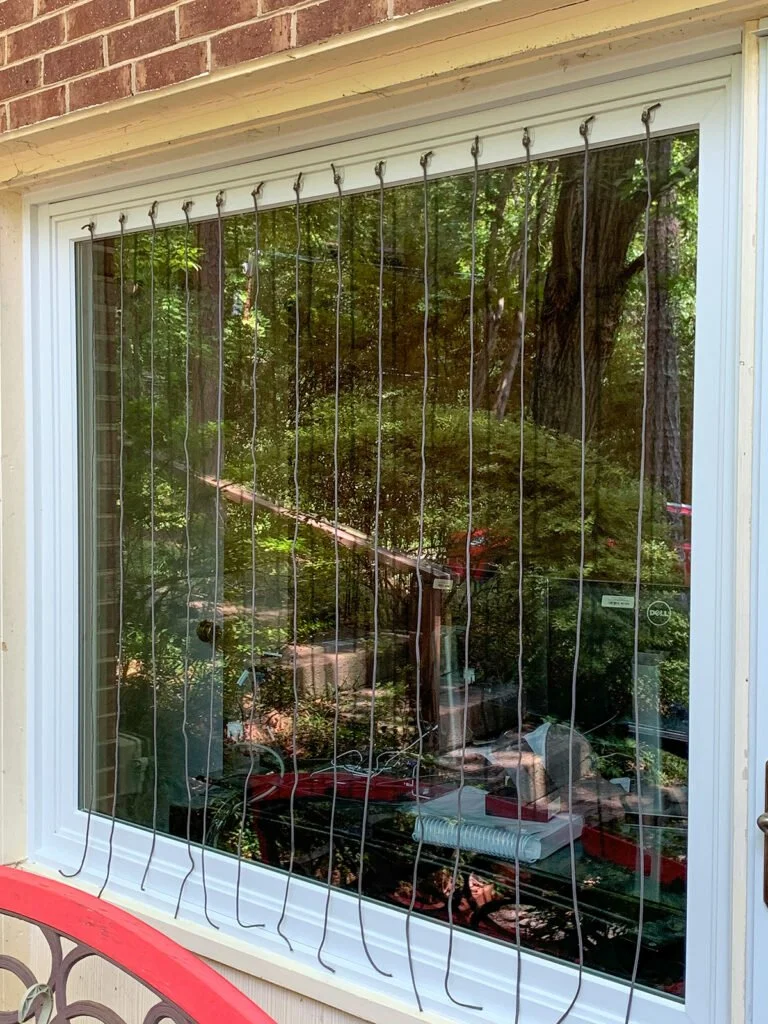
Option 3: Parachute Cord

Ready-made Solutions
Our Favorite Ready-made solutions:
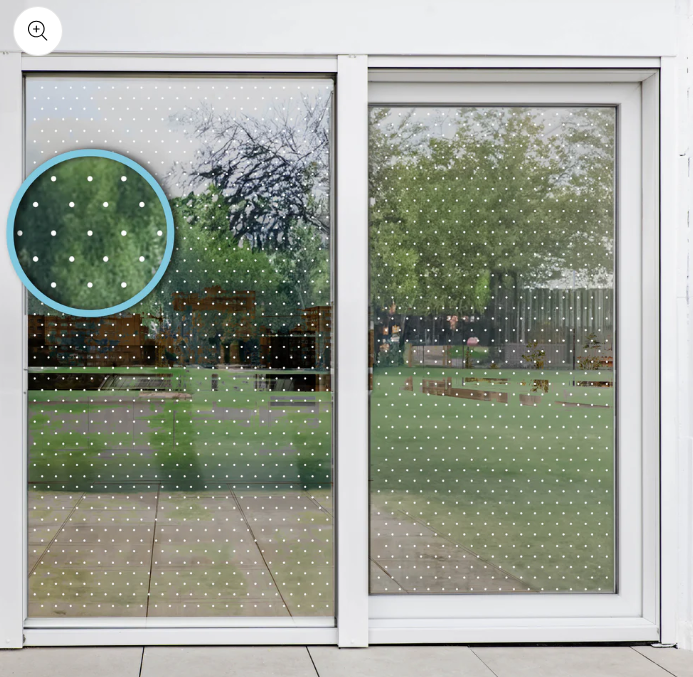
Feather Friendly Dots
Subtle, nearly invisible dots that create an effective pattern across the glass.
See a real Minnesota homeowner’s project using Feather Friendly dots.
ABC BIRD TAPE
Clear tape or squares that can be applied in custom patterns on the outside of the glass to make windows visible to birds.

Acopian Bird Savers
Window Alert Static Cling Decals
Various shapes available
Must be applied with 2” x 2” to be effective.
Available to purchase online and bird feeding retailers.
For detailed information on this product including its efficacy and tips and trick click here.
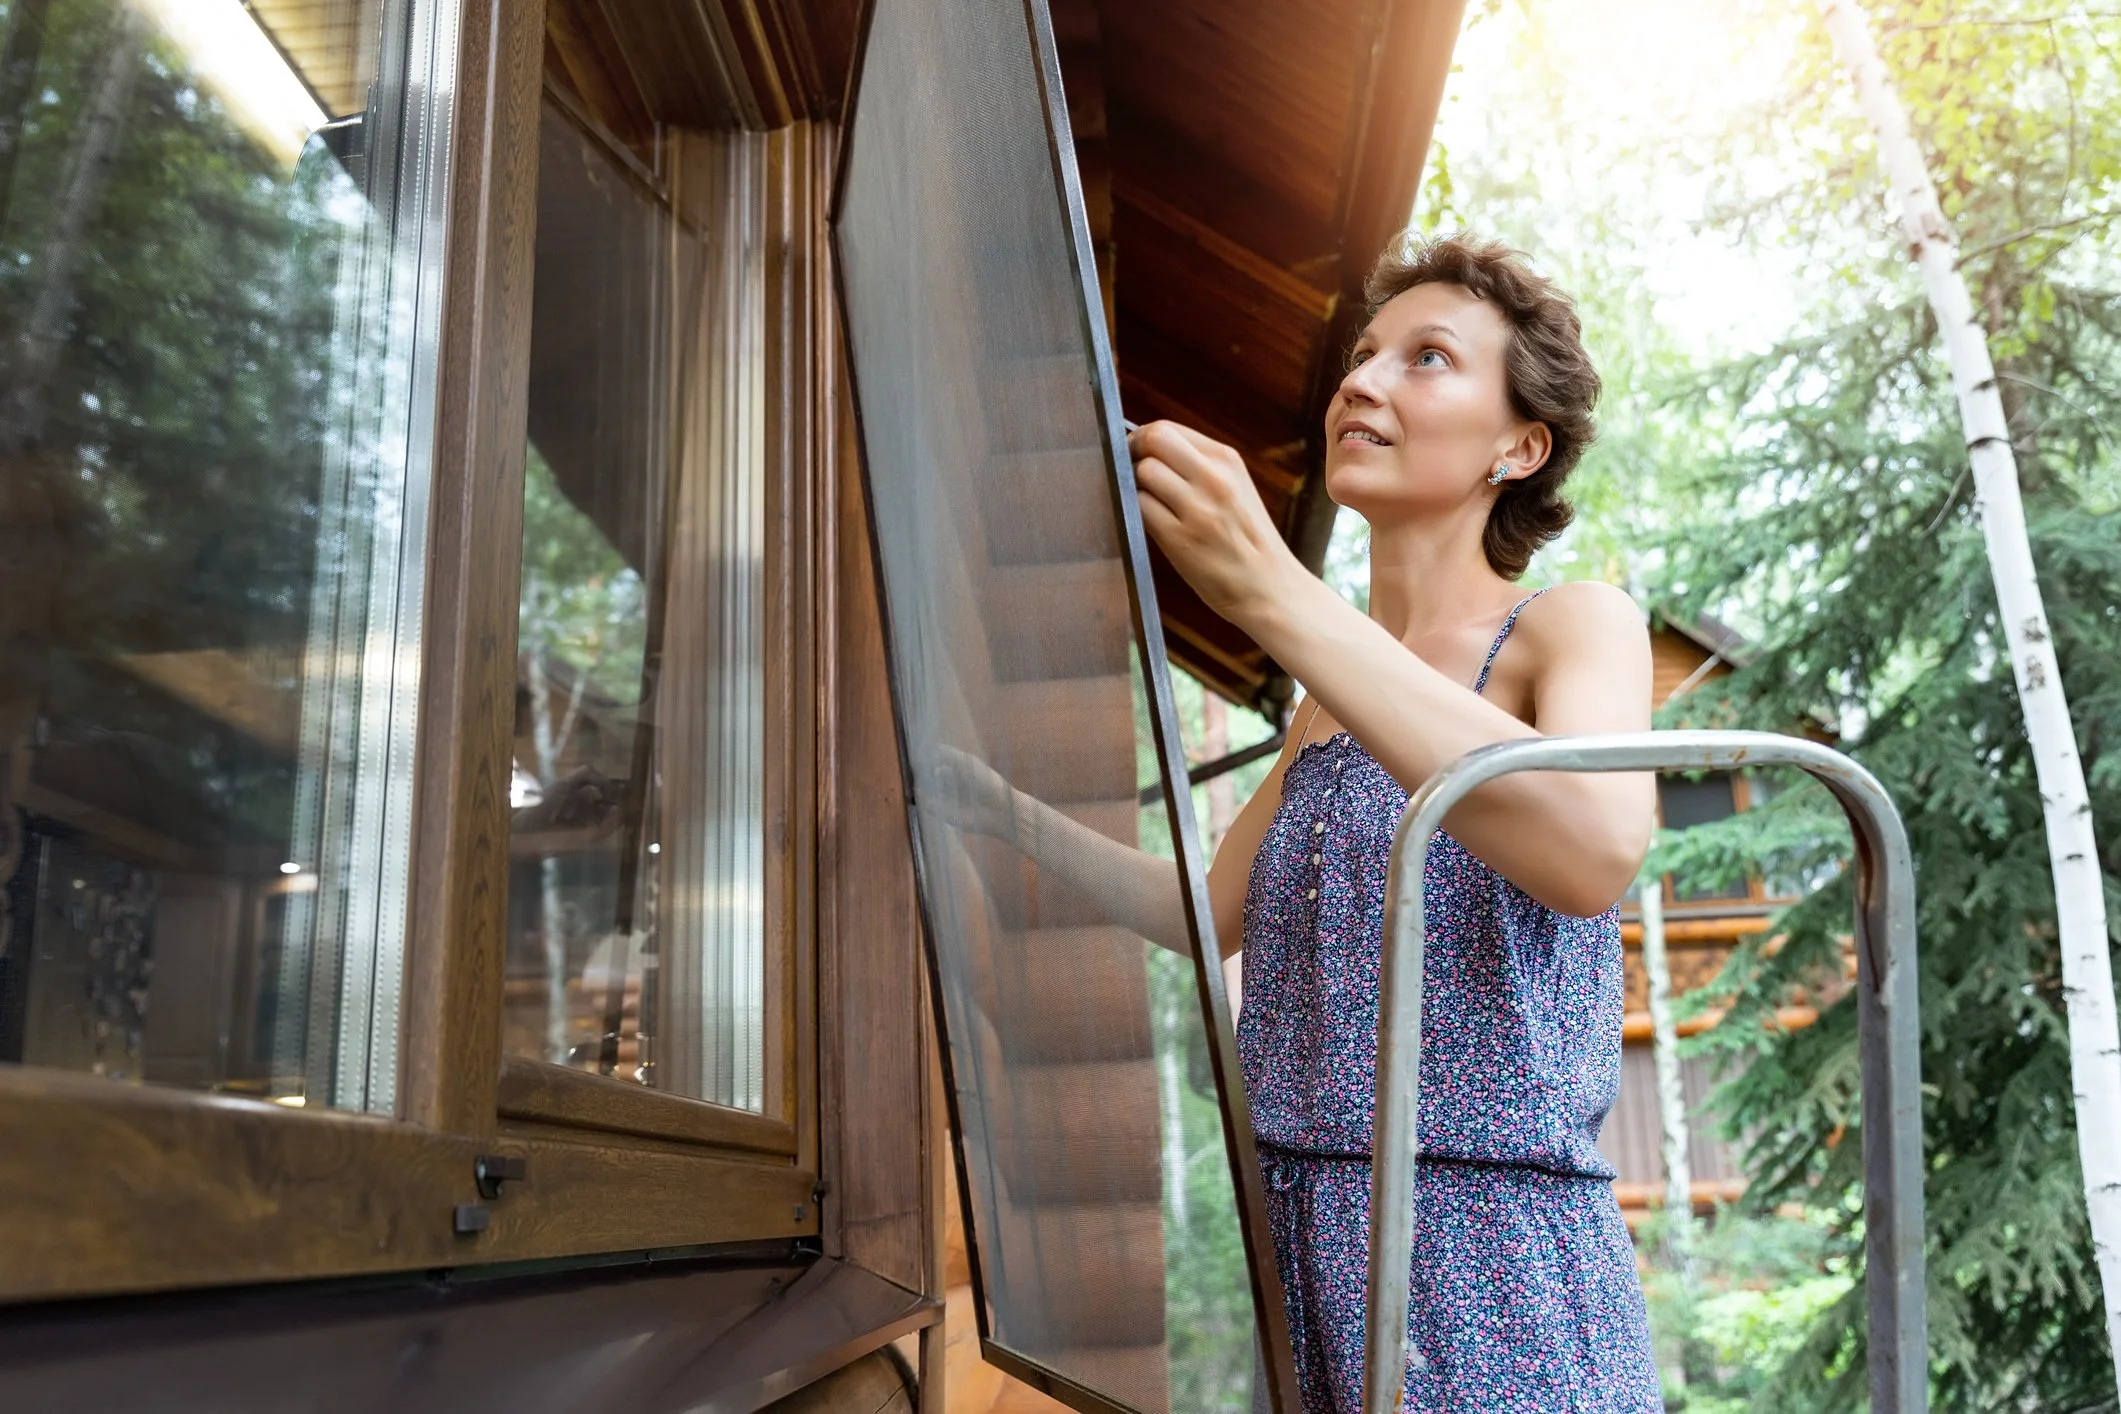
Exterior Insect Screens
ABC Bird Tape: 2” inch squares or 3/4” tape
Applied in 2 “ x 2” grid
Purchase here.
Photos courtesy of Feather Friendly.
See a real Minnesota homeowner’s project using ABC Bird Tape squares.
Vertical cords that hang in front of the glass to break up reflections.
Acopian Bird Savers
DIY or custom made to your windows.
Spaced 3.5” - 4”
Purchase here.
Photo courtesy of Acopian BirdSavers.
Window Alert UV Clings

Static-cling decals that add visible markings to the glass when applied in a pattern.
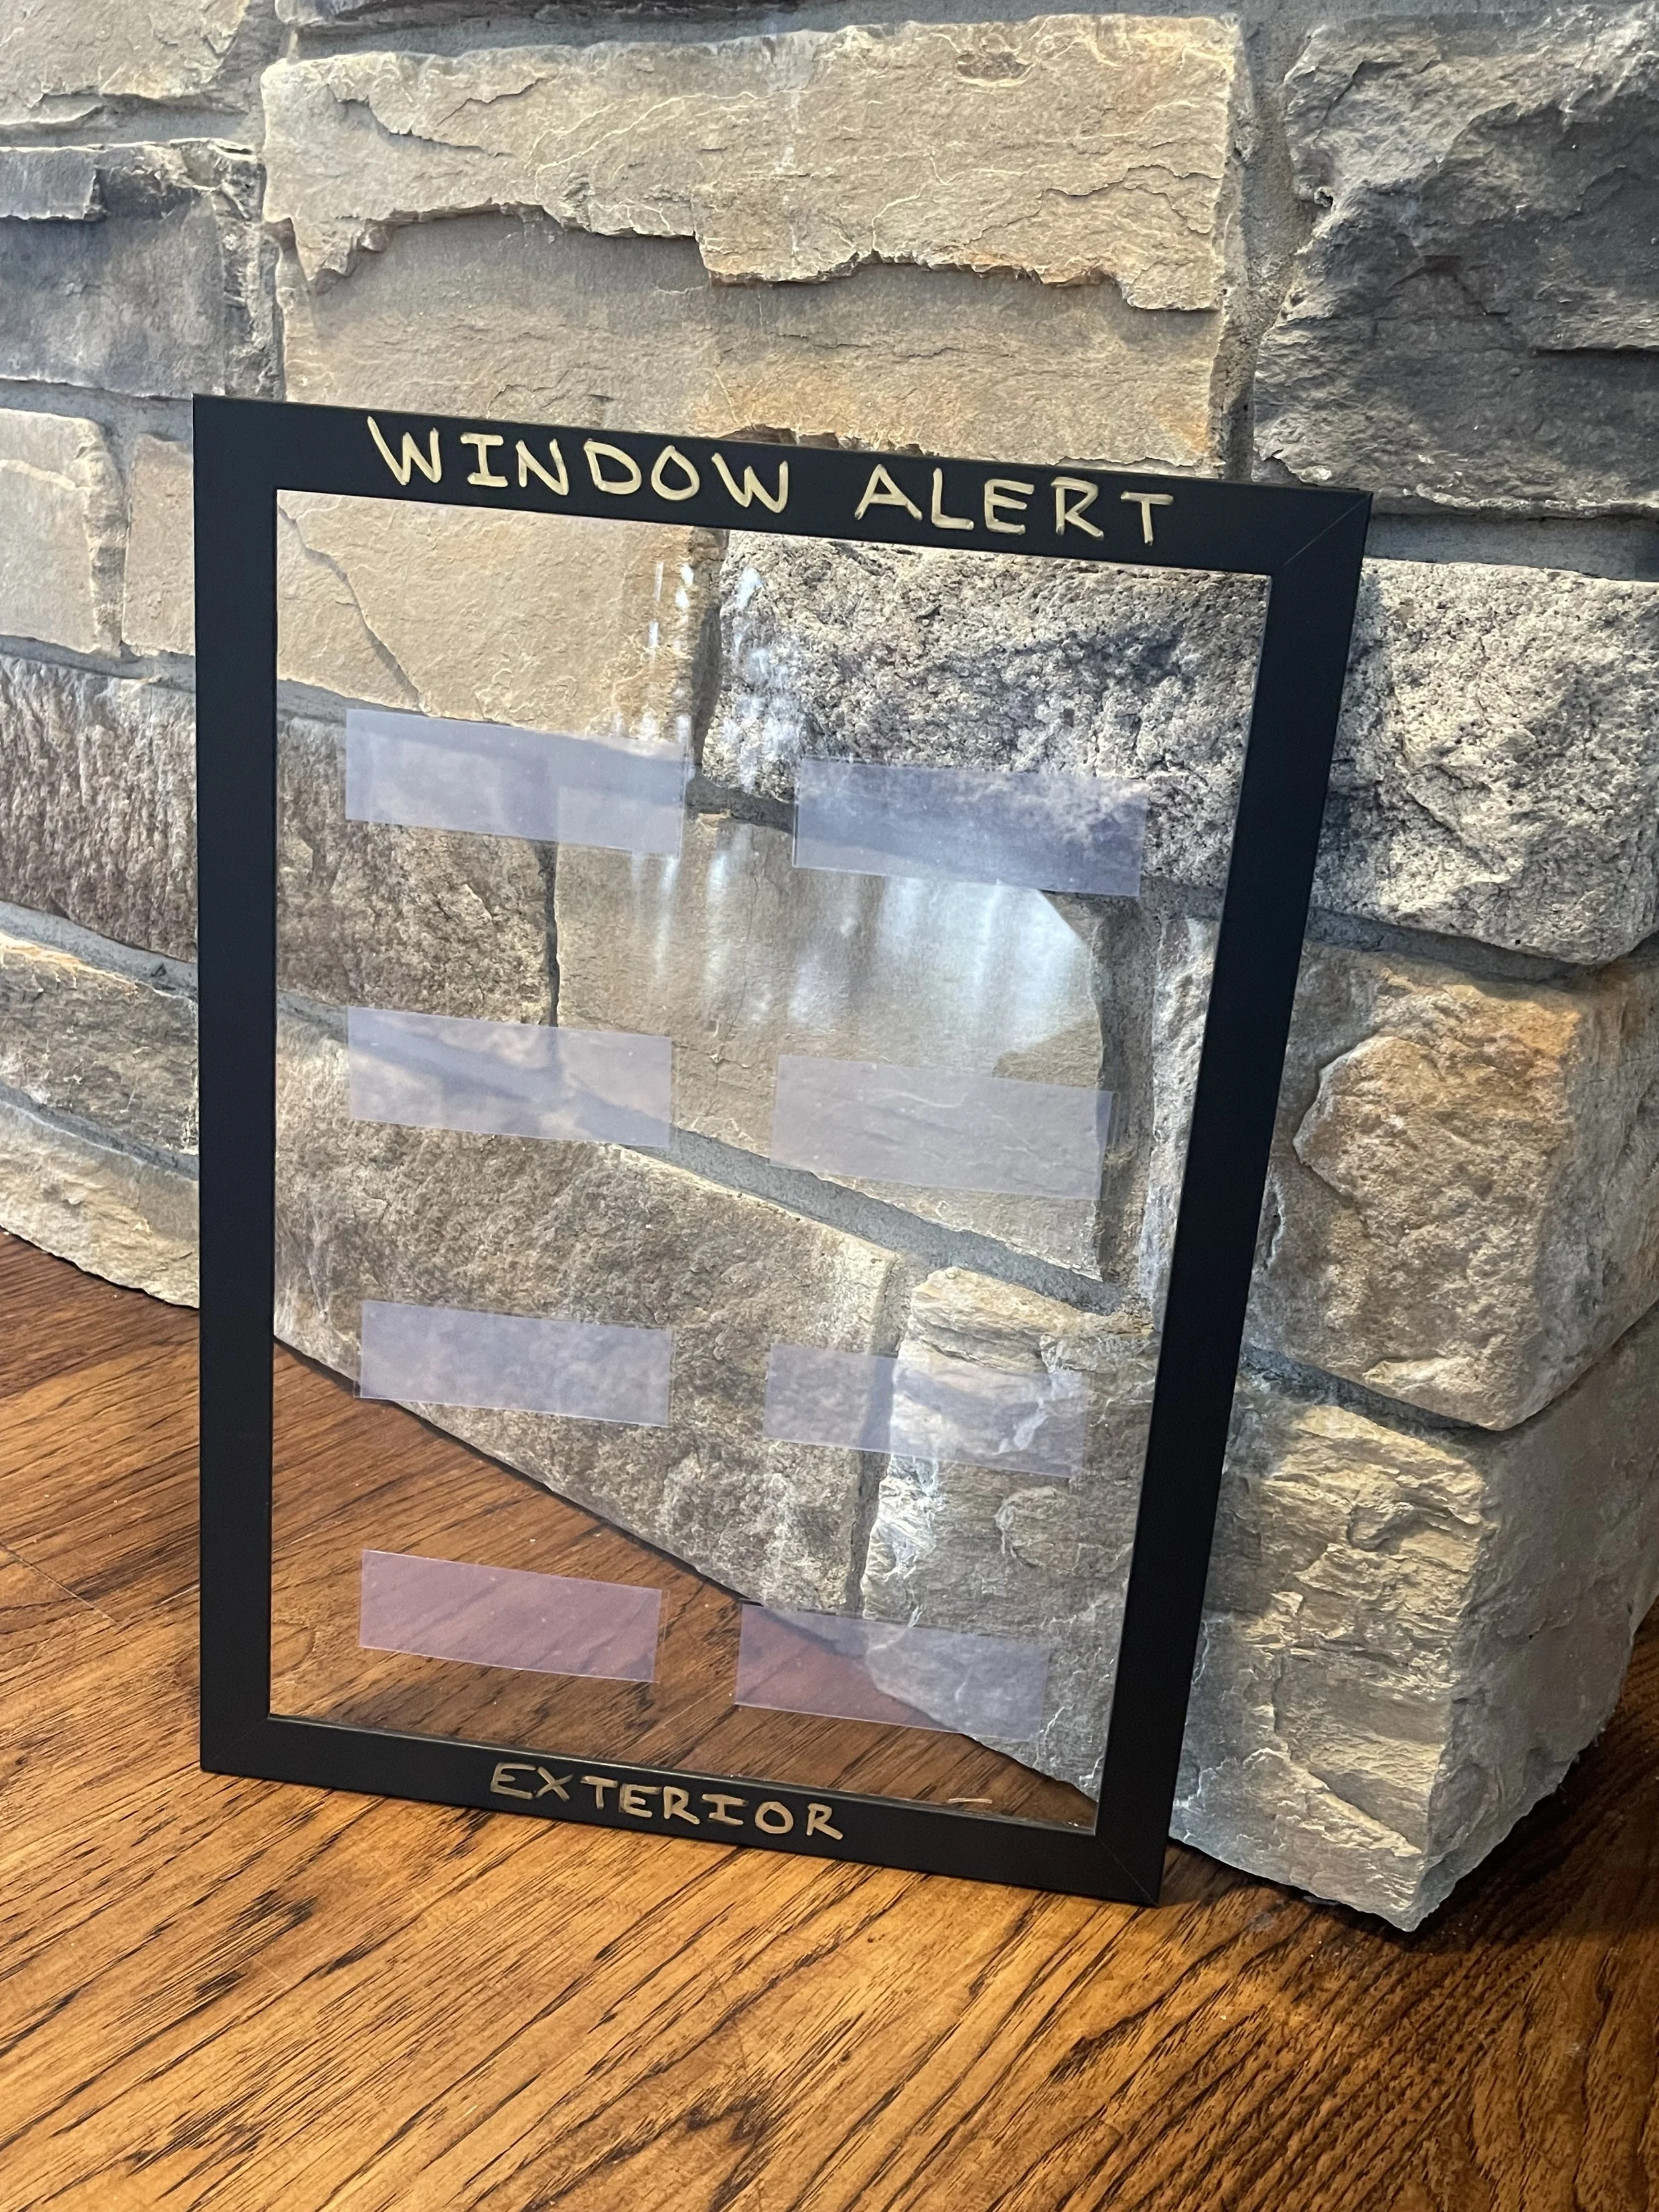
This pattern was creating by cutting the Window Alert 3.375” x 3.375” squares into three equal strips and applying strips in 2” x 2” grid.
Exterior insect screens reduce reflections and create a visible barrier in front of the glass.
Exterior insect screens help create a visible barrier and can also help soften impacts if a bird does strike the window.
Leave them on all year round.
Step 2: Install it the Right Way.
Effective collision prevention depends on the right solution applied the right way.
S.O.S. is the difference between what works—and what doesn’t.
S.O.S. Rules of Installation
“S”: Space element no more than 2 inches apart, across entire glass surface.
“O”: Apply it to Outside of glass
“S”: Use colors that birds can See. White gives highest contrast.
Where to Start
Level 1: Fix the Known Problem
Prioritize windows that are known to cause collision.
Level 2: Fix the Likely Problems
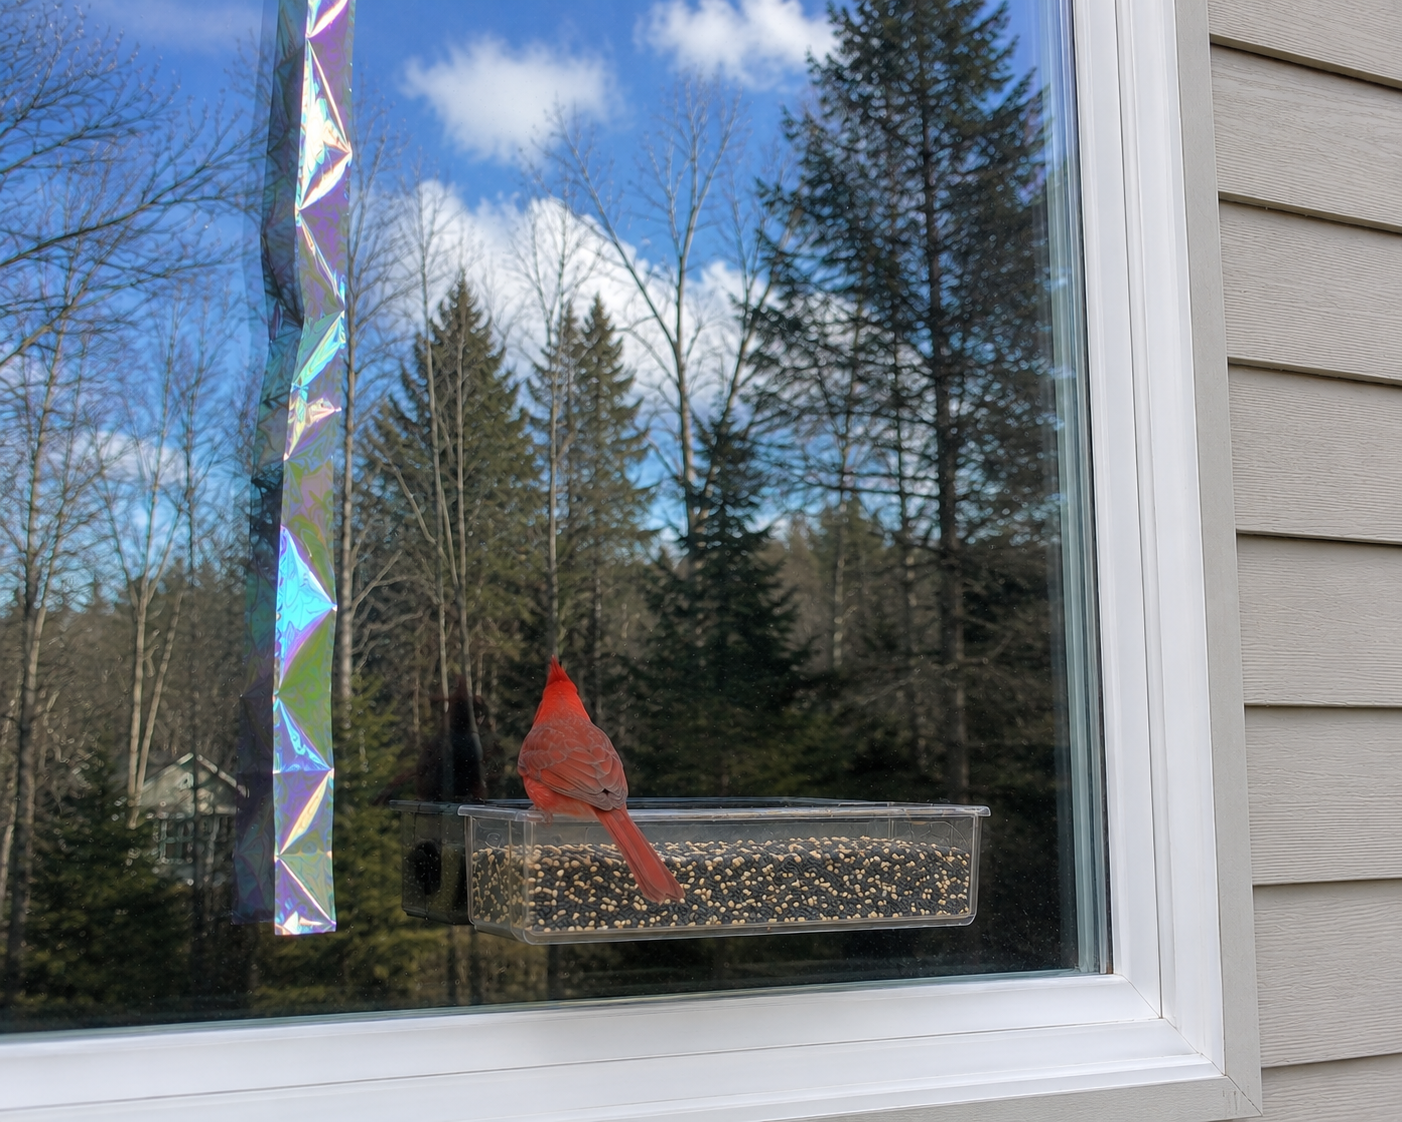
Evaluate your home and identify windows likely to cause collisions. These include windows near bird feeders and baths, windows near or reflecting foliage, and large expanses of glass such as patio doors and picture windows.
Level 3: Fix the Whole Picture
For full protection, treat all your home’s glass.
Proper Spacing
To protect the most species, including hummingbirds:
2 inches by 2 inches
Acceptable but less protective:
2 inches by 4 inches
This spacing does not protect hummingbirds or smaller warblers.
Full Coverage
Apply the pattern across the entire glass surface, starting 2” from the edges of the framing. Birds will still hit in any gap larger than 2”.
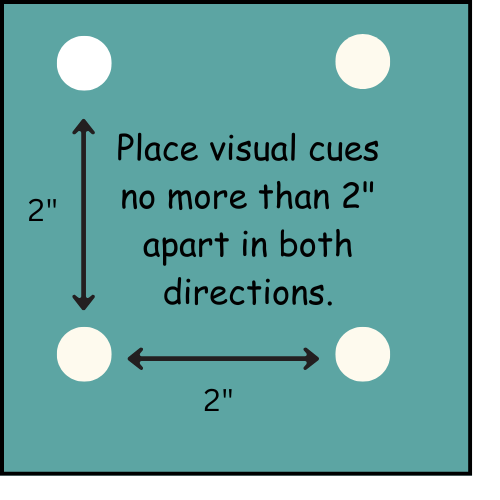
For most comprehensive protection, aim for no more than 2” between any element of the pattern (visual cue). In this above example, the elements of the pattern is a white dot.
Visibility
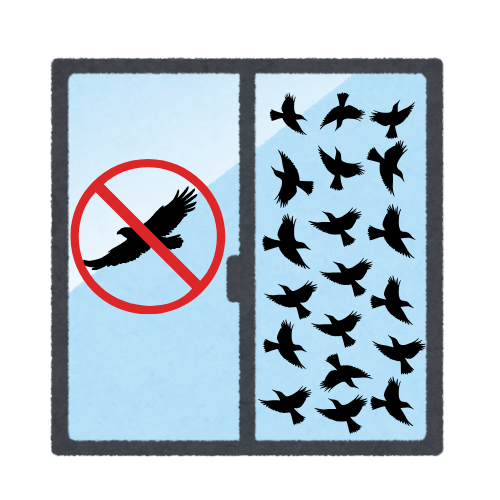
For any solution to work, birds have to be able to see it.
Here’s how to make it visible:
Install solution on outside. Interior placement is not effective.
Use high-contrast colors.
Choose white for glass casting reflections
Choose black for fly-through glass- glass that birds can see straight through
3. Make sure your markings are large enough to see.
Lines: at least 1/8 inch thick
Dots or shapes: at least 1/4 inch diameter
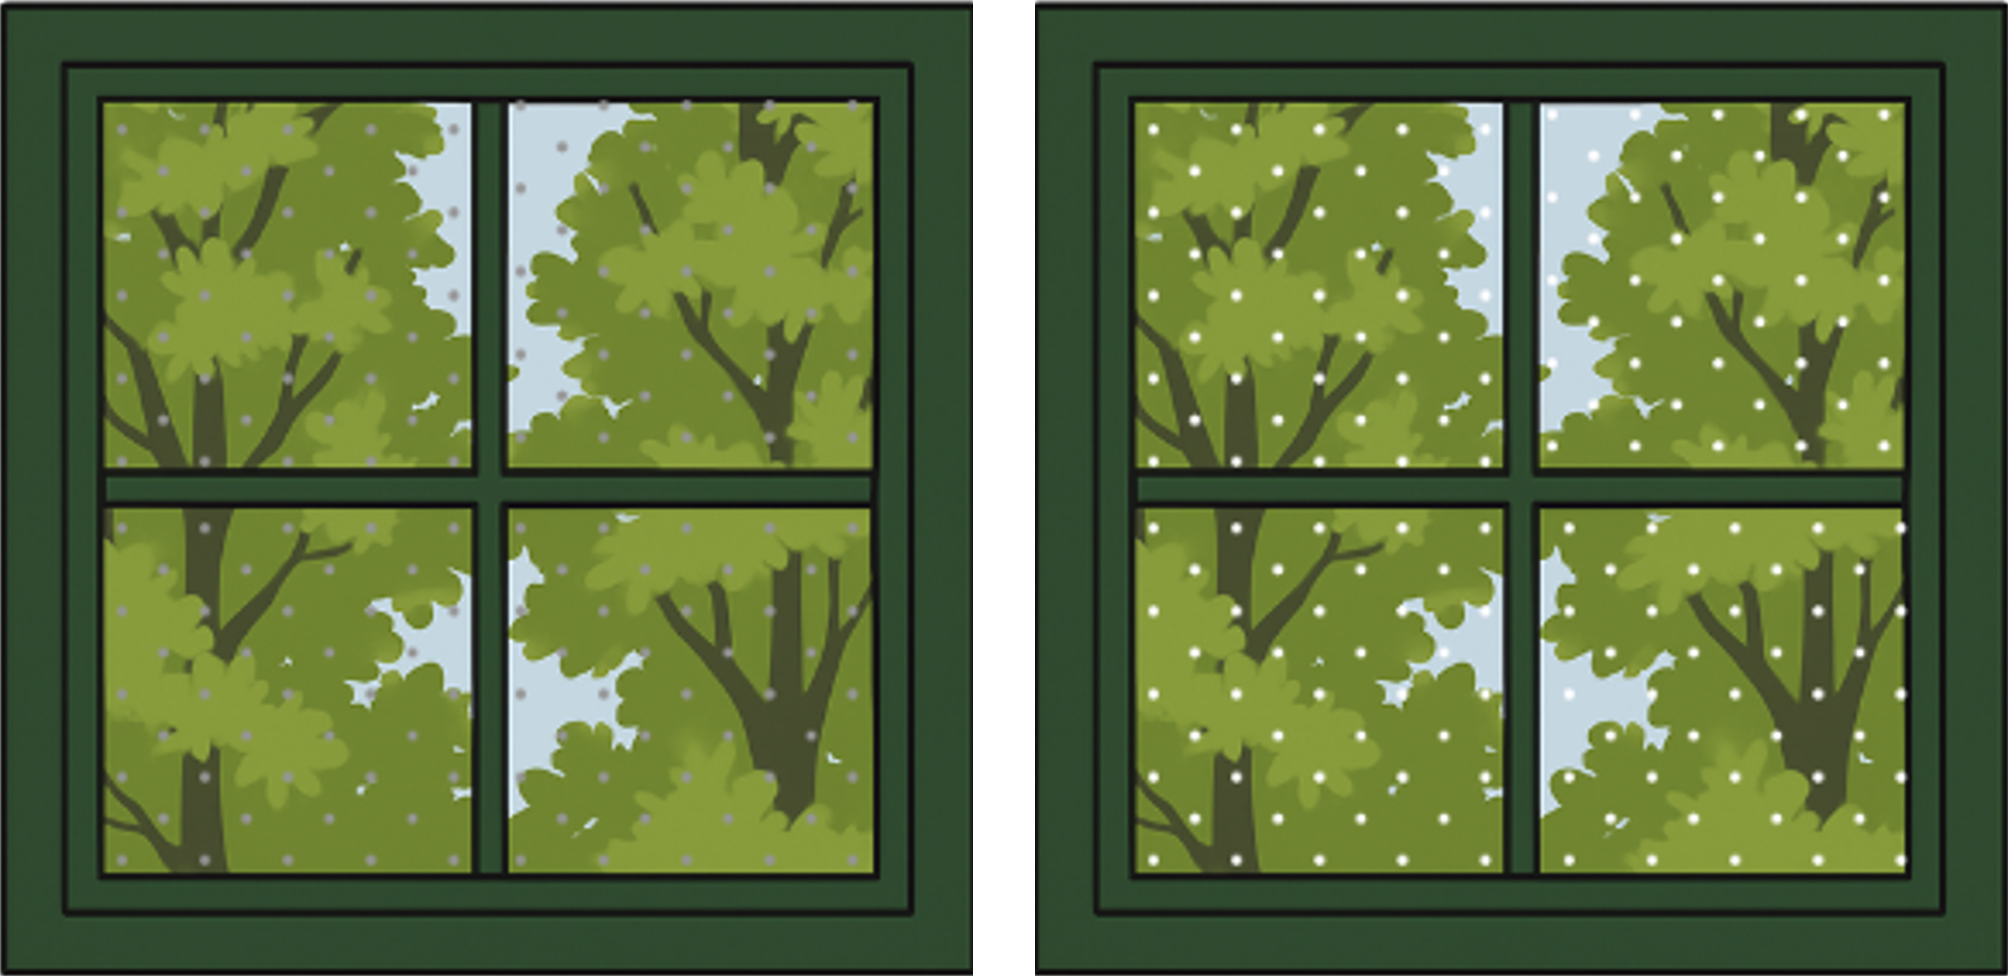
This diagram shows how much more visible patterns are when applied to the outside (right) versus the inside (left). Exterior placement breaks up reflections and makes the glass visible to birds.
Why Spacing is so Crucial
Birds don’t see your window as a solid barrier—they see the gaps between your markings. If those gaps are too large, they’ll try to fly through them. Keep reading to see exactly how small those sections must be.

Size
Many birds are much smaller than people expect. The Ruby-throated Hummingbird is smaller than a man’s fingers, which helps show just how little space these birds need to slip through a gap.
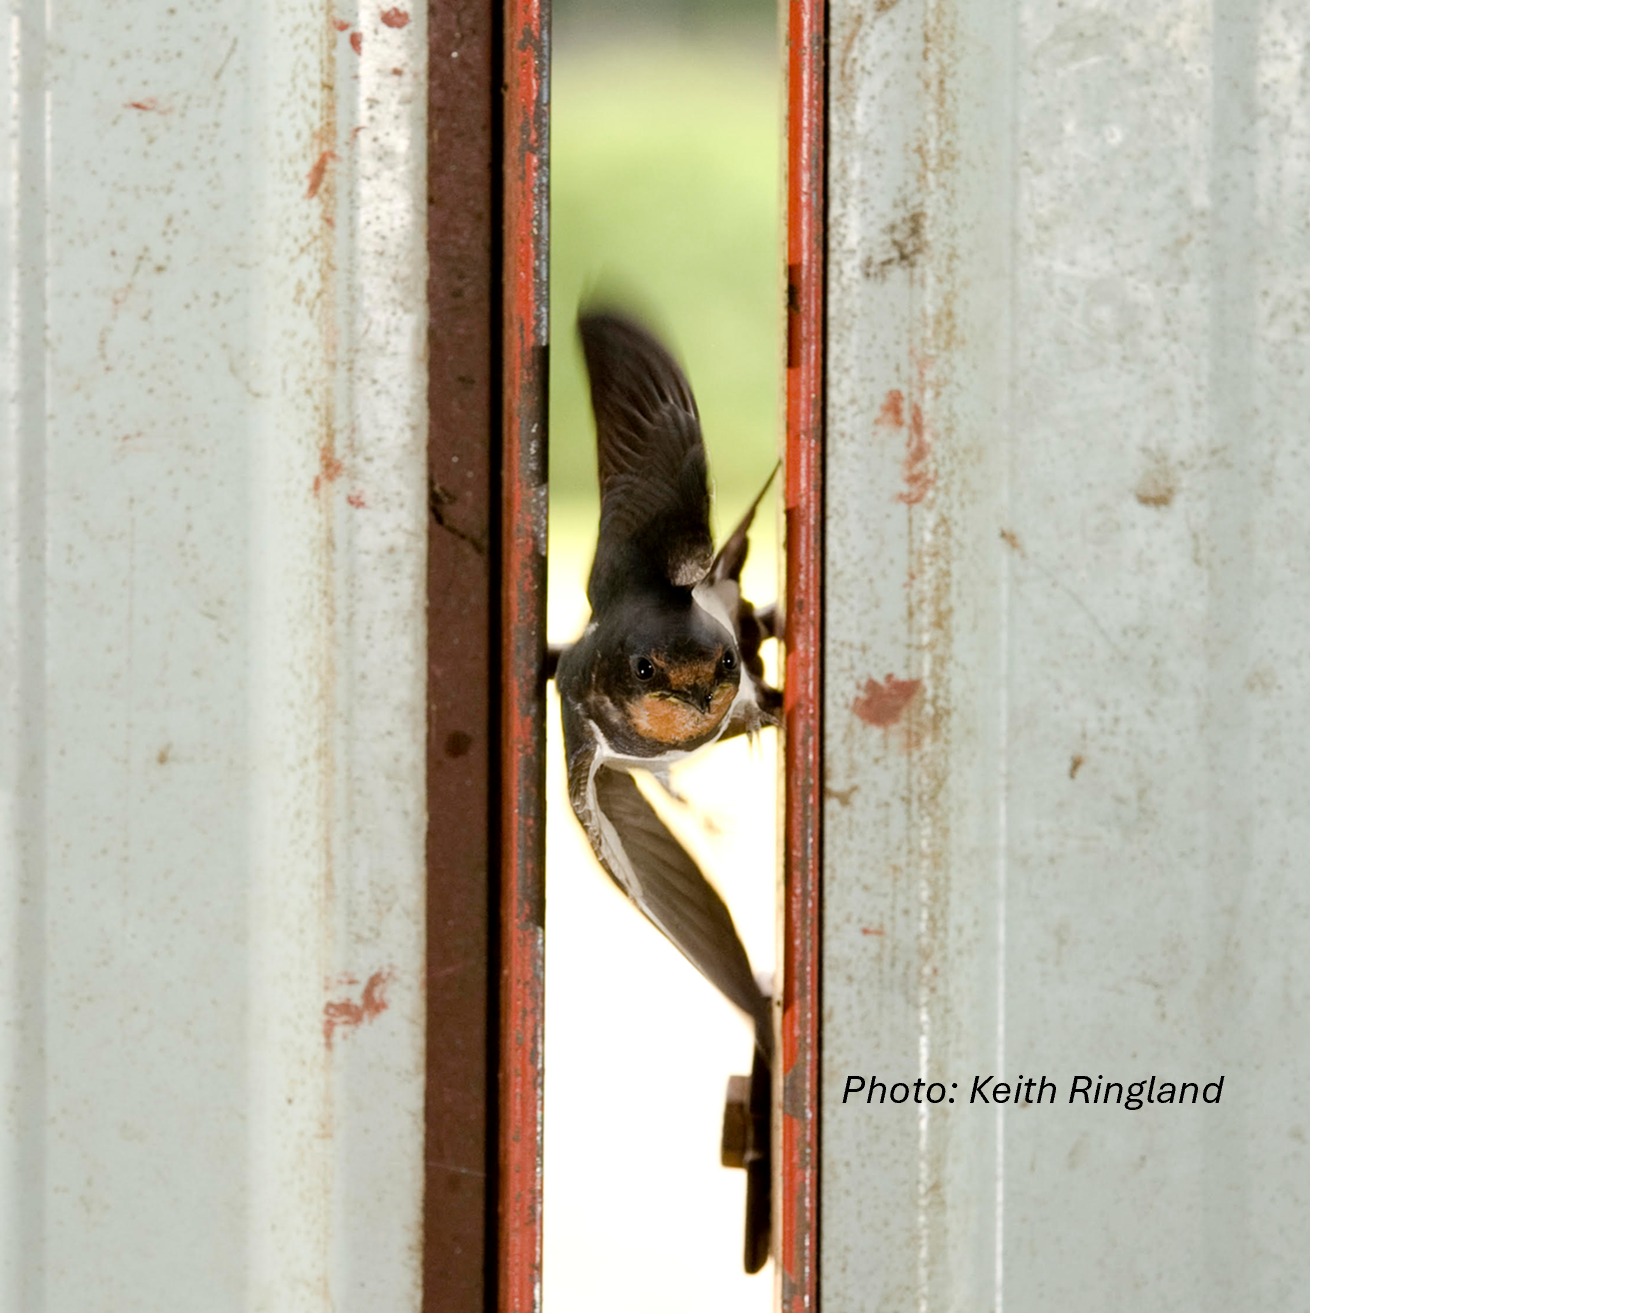
Maneuverability
Birds are incredibly agile. Even larger species can twist and maneuver through surprisingly narrow openings, which is why larger gaps in window patterns are a hazard.
What doesn’t work
Some commonly suggested approaches don’t prevent window collisions because they don’t follow the S.O.S. rule. Understanding why can help you avoid wasted time and effort.
Hawk Decals or stickers
A single decal only prevents collisions where it is placed. To be effective, decals must be applied in a pattern with 2" × 2" spacing. Birds do not mistake these for real predators.
Bird scare tape and reflective streamers
Scare tape and streamers don’t break up reflections, so birds still see open flight paths. They are not a reliable deterrent, and birds may ignore or quickly get used to them.
Closing the blinds or curtains
Reflections on glass are the main cause of bird collisions. Even when blinds or curtains are closed, these reflections remain, and birds still see sky and trees.
Window Collision Deterrent Product Information
MNBC evaluates commonly used deterrent products and provides straightforward summaries that cut through confusion by highlighting the key factors: the supporting science, demonstrated product effectiveness, and practical tips and tricks for the most effective and efficient use.
Effectiveness information reflects published testing when available; if no testing exists, that will be noted on the sheet.
Product Information Sheets:
Below are the products MNBC has evaluated; click any product name to access its information sheet.
Feather Friendly Markers
WindowAlert UV Decals
Window Gems
This section is under active development. Thanks for your patience as we build out practical, easy-to-use guidance for you.

Please be patient while we grow the database. We are trying to bring you the most up to date and complete information as possible.
Drop us a line if you would like us to compile information for a particular product.
Make Your Efforts Count
When you make your windows bird-safe, you’re doing more than protecting birds at your home—you’re joining a growing effort to make Minnesota safer for birds.
Add your bird-safe windows to the map
Help track progress and show how individual actions are building something bigger.
Report the window collision
Your report helps identify where collisions are happening and where solutions are needed most. This data can help drive research and advocacy efforts.
Window Safety Helps at Home. Turning Off Lights Helps Birds Everywhere.
Turning off lights during migration helps keep birds on course and away from buildings, where they can be drawn in by artificial light and collide with glass.
How to Reduce Light Pollution at Home
Follow Lights Out During Migration
Turn off unnecessary outdoor lighting during peak migration periods
March 15–May 31 and August 15–October 31.
These are the months when millions of birds travel at night and can be pulled off course by artificial light. Keeping lights off helps keep them on their natural routes and away from buildings.
Make Darkness Your Default All Year
The biggest impact comes from everyday habits. Turn off outdoor lights when you don’t need them, use motion sensors or timers, timers, and downward facing light.
Choose Dark-Skies–Friendly Lighting
When you replace or add outdoor lighting, choose fixtures that point light downward, use warmer bulbs, and reduce glare and skyglow. For more information about choosing dark sky friendly lighting fixtures see DarkSky.
Want to know the nights when turning off lights matters most? Sign up to get real-time alerts right in your inbox. We’ll let you know when a night of intense migration is expected.
Want to do more to help birds?

Learn how to keep your cat and wildlife safe and happy

Learn how to make your own yard a haven for birds with native plants.
Please consider making a tax-deductible donation to help us keep this work going. Your support directly funds our website, citizen science projects that drive real advocacy, and the printing of our educational materials.
